Hello, readers!
In today’s post, I will be discussing the cloud, what it is, some of its features, and how we can use Amazon Web Services (AWS) to create a Virtual Private Cloud (VPC) with a Windows 2019 instance and security components. Before we move on I’d like to explain what AWS is. Amazon Web Services is a platform that provides cloud services and software tools on-demand with flexible payment models. With AWS, you can log, store, and migrate data. AWS provides its own hardware as a pay-as-you-go pricing service, so users are only charged based on time and usage. AWS offers full cloud, hybrid, and on-premises services for businesses.
You can run websites, register domains, create data lakes, perform network health evaluations, pull governance and compliance information, automate security protocols, use machine learning, develop software, and so much more. Learning to use AWS is akin to becoming a cloud wizard. If you’re interested in learning more about AWS, send an email to connectme@urtempo.com to find out how I’m preparing to achieve the AWS Certified Cloud Practioner certificate. For now, we’ll start by defining the cloud in this context.
*Update: I have passed the AWS Certified Cloud Practitioner exam and have received my certification.

The Cloud
The cloud is a little complicated and can refer to different things. In this case we’re referencing an invisible domain of storage and traffic that come from physical hardware being served over a network. Cloud servers are located in databases worldwide, and can be accessed from nearly anywhere with a network connection. Amazon realized how useful cloud services would be and took it upon themselves to launch AWS in 2006. Companies like Netflix, Twitch, LinkedIn, Facebook, ESPN, Adobe, Twitter, and more have spent millions of dollars on AWS cloud computing services alone. Because of this, cloud-based IT skills are in high demand.
With AWS, you can use cloud computing to do things like set up a Windows virtual machine instance that hosts files accessible to multiple employees. People are even hosting Minecraft servers on AWS. In this blog, I will be demonstrating how to set up a Virtual Private Cloud using Amazon Web Services. It will be capable of cloud storage, cloud computing, serving up a virtual machine instance, and more. The VPC will include security groups, an internet gateway, network access control lists (NACLs), an elastic IP address, and more. Let’s get started, shall we?
AWS Console Home
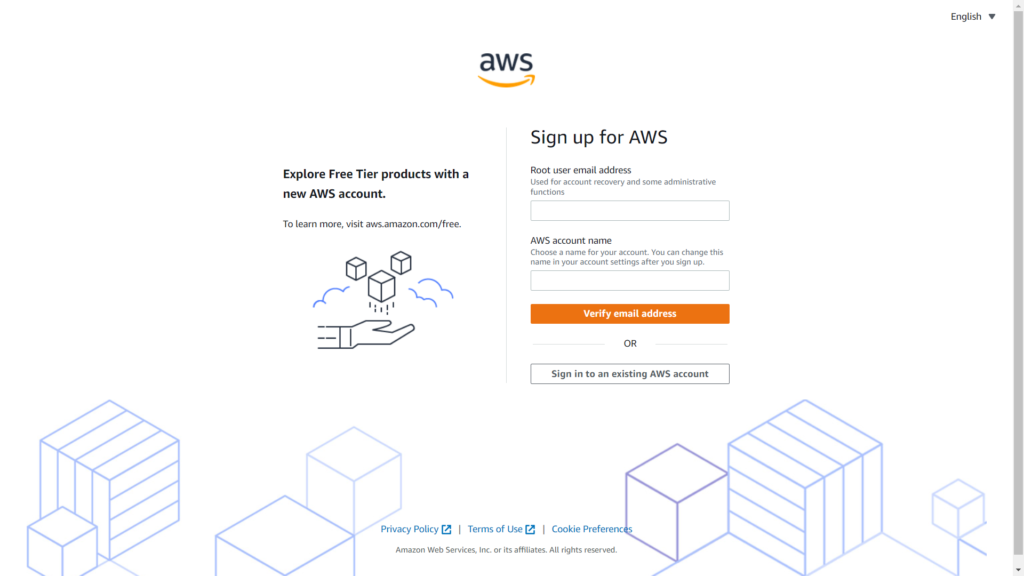
To enter the AWS Console Home, you must create an account or sign up for one. AWS doesn’t use the same login credentials as Amazon uses for its regular e-commerce site. In addition to setting up your username and password, you will also be given the option to set up multi-factor authentication (MFA), which is highly recommended. Personally, I use Google Authenticator for all of my MFA needs. The same Google account can be used as a third-party authenticator for various apps and websites. Essentially what it does is provide you with a 6-digit code that randomly generates every few seconds. Even though the code is constantly changing, a site that is set up with MFA will be configured to read those changes in real-time. MFA serves as an extra layer of security, because even if your username and password are comprimised, an attacker will still need your MFA code to access your account. Now, let’s take a look at the Console Home dashboard:
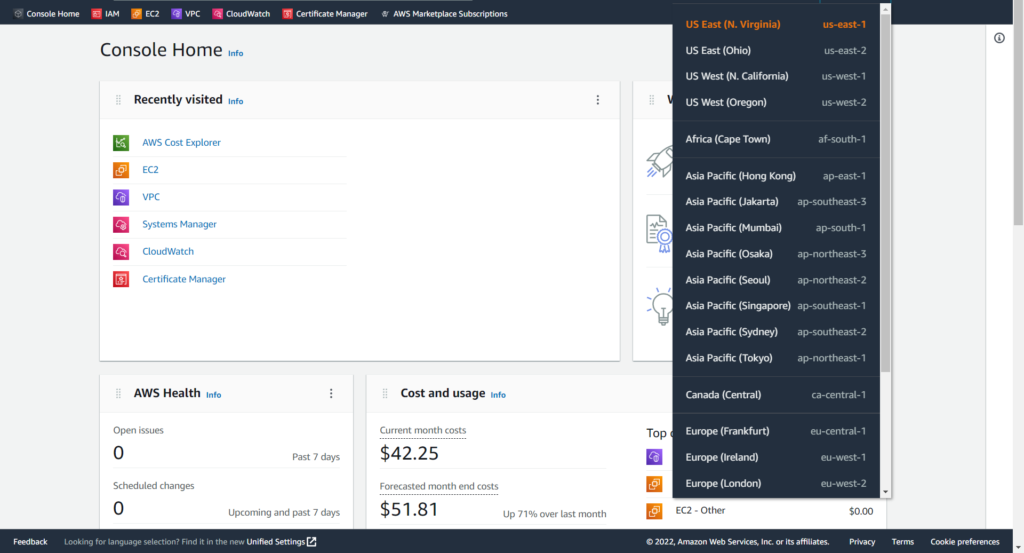
Recently visited displays the AWS services that you have most recently accessed. AWS Health provides any issues that may concern a user about their cloud architecture. It contains event logs and even a “Health Integrations” portal for connecting it to other AWS services. Cost and usage is as the name implies, showing users a detailed overview of expenses and usage of services. If we scroll down, we’ll find other neat features within the dashboard. For now, we’ll stay on track and select a region from the Global dropdown menu. Notice how there are regions in the U.S., Africa, Asia, Canada, and more. You can create a VPC in any of the regions offered, but some regions are more recently installed and may not have access to specific AWS services yet. Why you choose a region will depend on proximity to customers and what services your require. Please refer to compliance policies when considering how you conduct business in other parts of the world. This time, we will be building a VPC in US East (Ohio). By selecting Ohio as our region and by either clicking or typing VPC in the AWS search bar, we can access the page needed to begin the project:
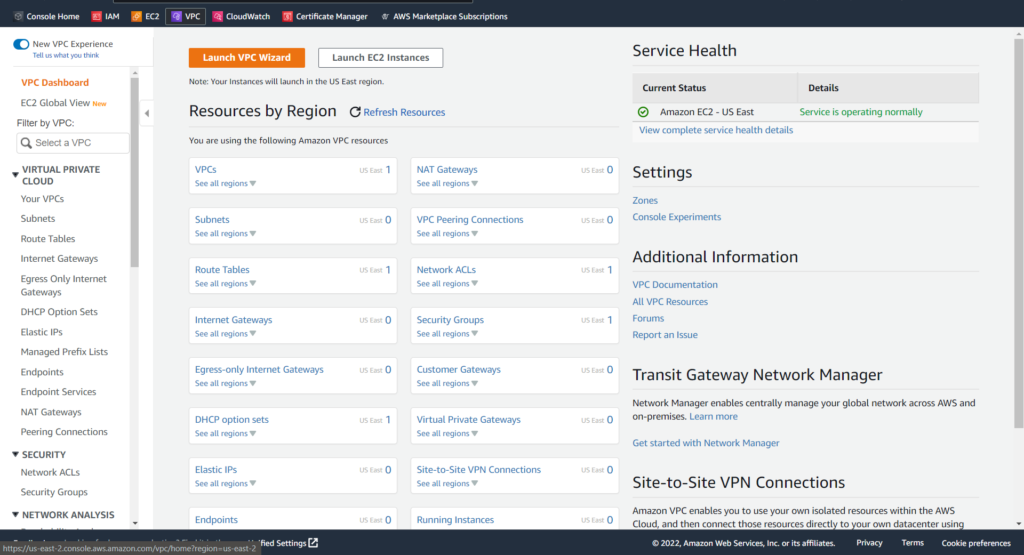
From here, we can easily launch the VPC Wizard, which will complete much of the work needed to create a VPC for us. Alternatively, we can manually create a VPC which will give us a better idea of what exactly we’re setting up. For this blog post, I will manually create a VPC. This can be accomplished by clicking on Your VPCs in the left sidebar. From there, we can select Create VPC to manually build our virtual private cloud:
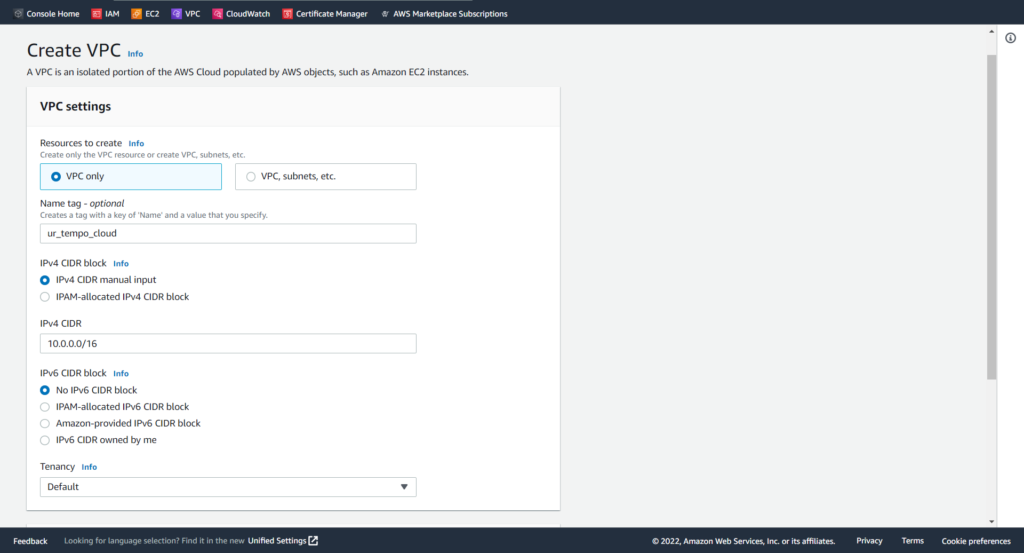
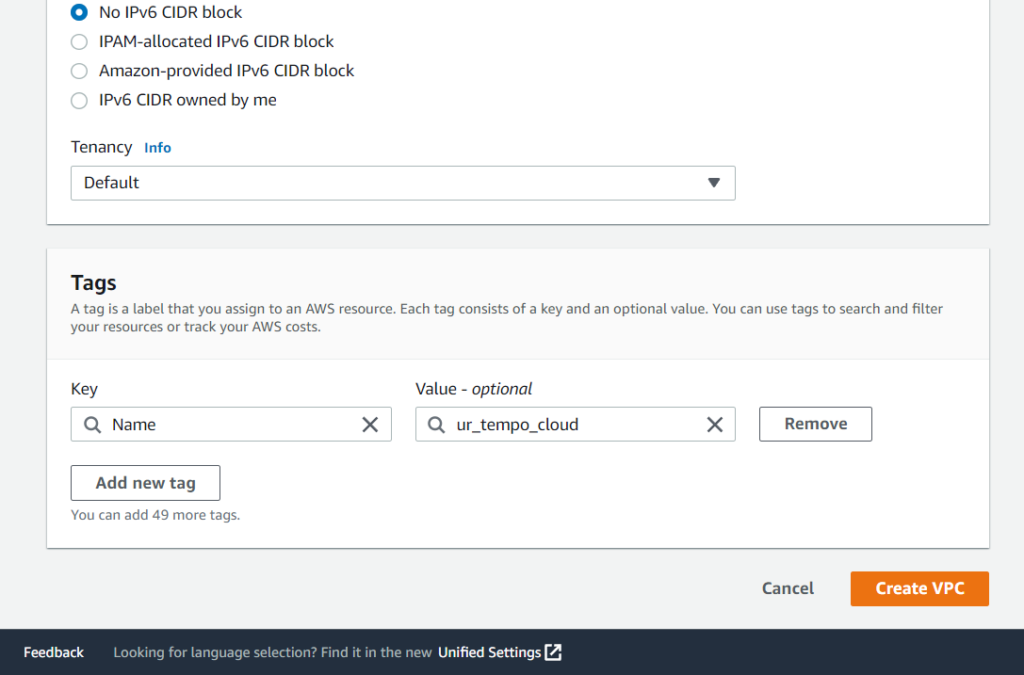
On this page, we can choose to select IPv4 and IPv6 CIDR blocks. In this blog post, I will not be going over Classless Inter-Domain Routing (CIDR) or the different types of IP addresses (IPv4 vs. IPv6). It isn’t important to understand CIDR blocks, but on the basic level, you should know that they provide a range of possible addresses available to a network. In this case, the /16 represents that range, but you may see other CIDR notations such as /24. Notice that I named the VPC ur_tempo_cloud and I selected No IPv6 CIDR block. Other than that, selecting Default in the Tenancy selection will ensure that we are using shared tenancy rather than dedicated. Shared tenancy allows multiple Elastic Cloud Compute (EC2) instances to reside on the same physical hardware. On the bottom of the page, we can select Create VPC to finalize our specifications.
Once created, we’ll add an internet gateway and some subnets.
Intenet Gateway
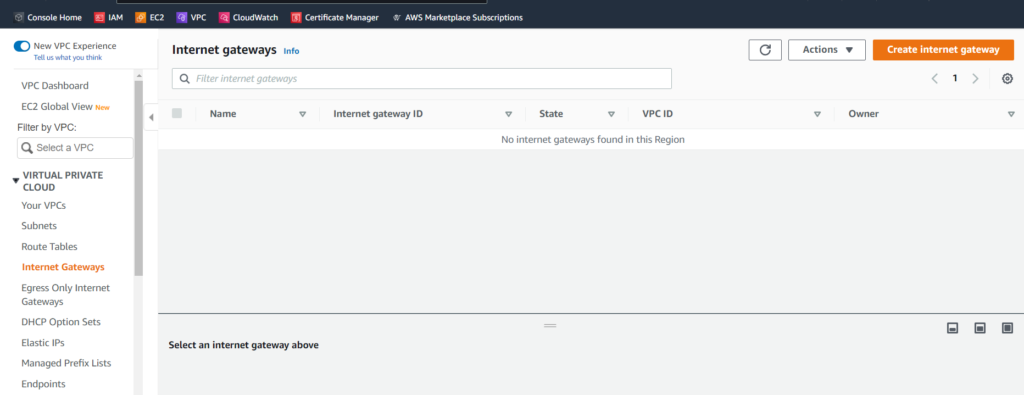
In the words of Amazon Web Services, “An internet gateway is a horizontally scaled, redundant, and highly available VPC component that allows communication between your VPC and the internet. An internet gateway enables resources (like EC2 instances) in your public subnets to connect to the internet if the resource has a public IPv4 address or an IPv6 address.” We’ll need to set up an Elastic IP address and some subnets in order to make our VPC operational, but we can start with the internet gateway. This can be accomplished by clicking Internet Gateways in the Virtual Private Cloud sidebar. Once we’ve done so, we need to select Create internet gateway.
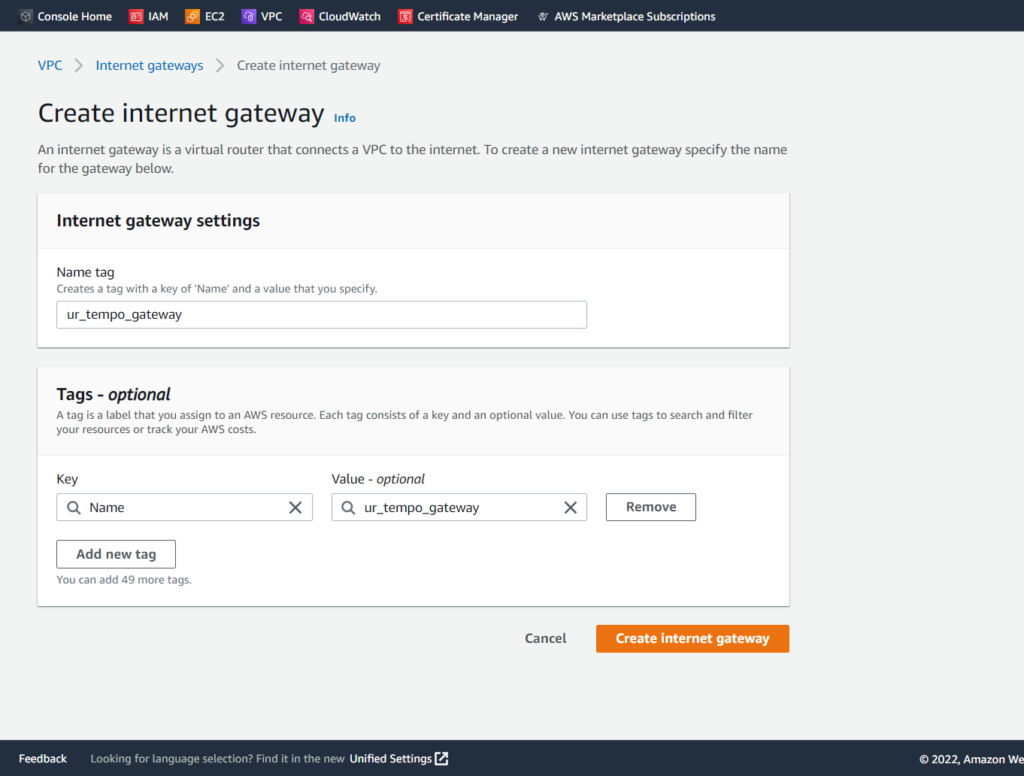
All we must do is give the internet gateway a name. I went with ur-tempo-gateway, as seen below:
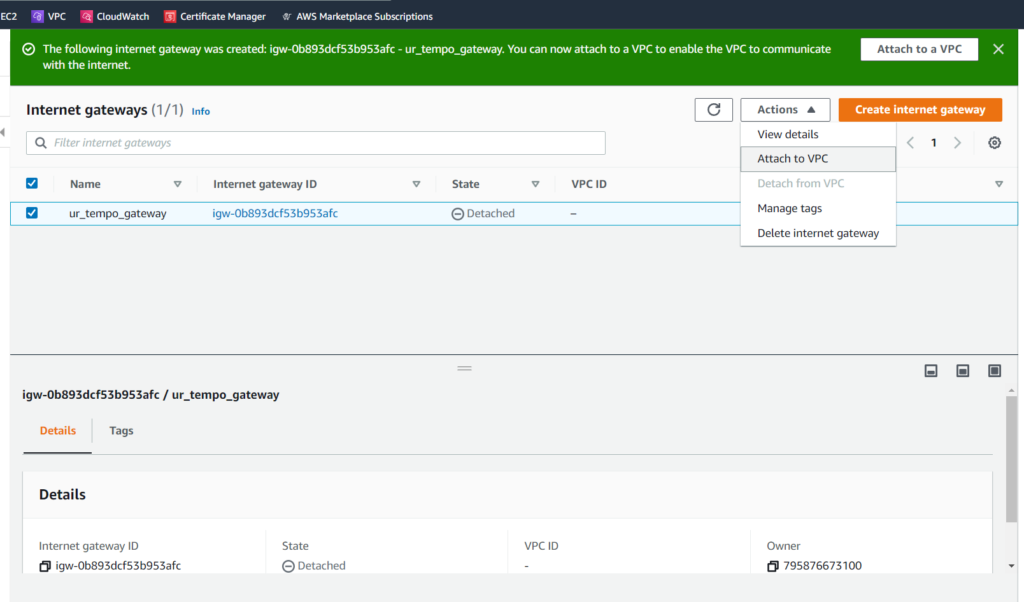
Once we select Create internet gateway, our configurations will be confirmed. We are immediately brought back to the Internet Gateways screen, where the option to Attach to a VPC is conveniently offered in the highlighted green notification window. Alernatively, we can select Attach to VPC from the Actions dropdown menu, as seen in the screenshot below:
From there, we must simply select the VPC that we wish to connect to (ur_tempo_cloud). Below is the option to connect to the VPC using a Command Line Interface (CLI). CLIs are a whole lot of fun, so maybe I’ll demonstrate that method next time.
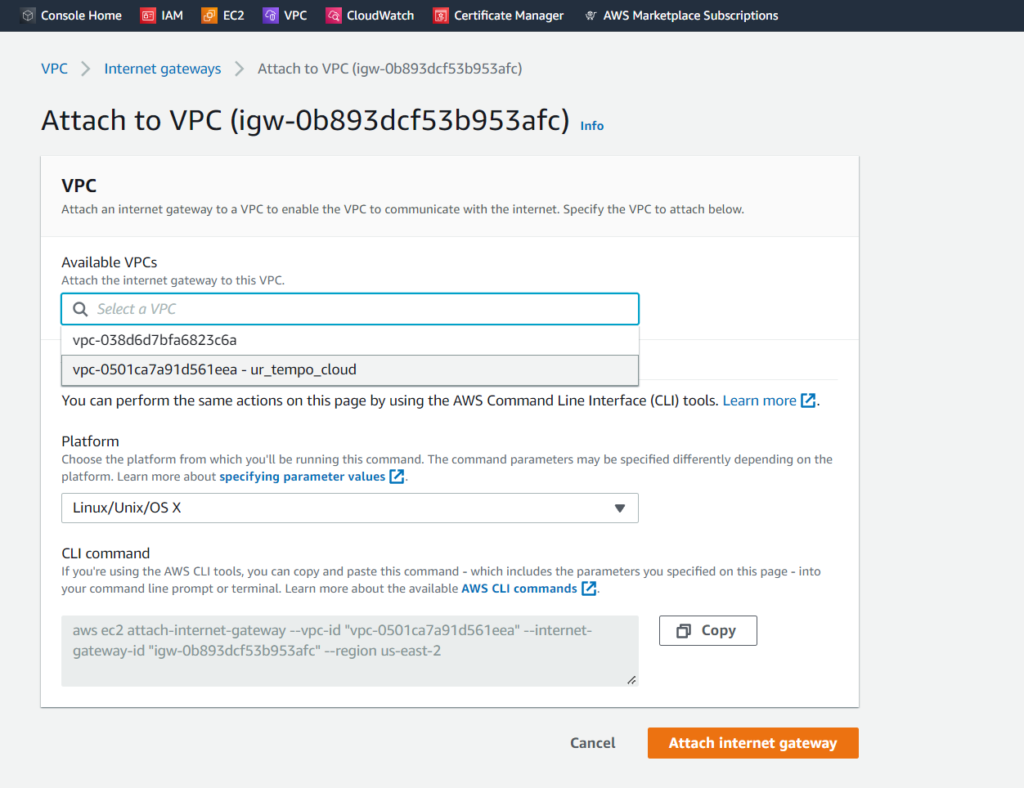
After clicking Attach internet gateway, we’re ready to move on to the next step.
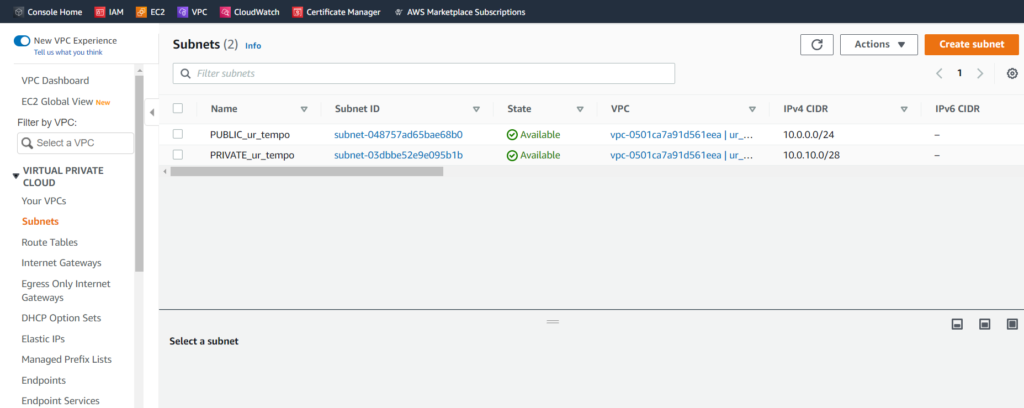
Subnets
With subnets, all we must do is define which VPC the internet gateway is associated with. For this particular VPC, we’ll fill this form out twice. The first time, the subnet will be named PUBLIC_ur_tempo and the second time, it will be named PRIVATE_ur_tempo. Because the CIDR blocks cannot overlap, the public subnet will be assigned to 10.0.0.0/24, and the private subnet will be assigned to 10.0.10.0/28.
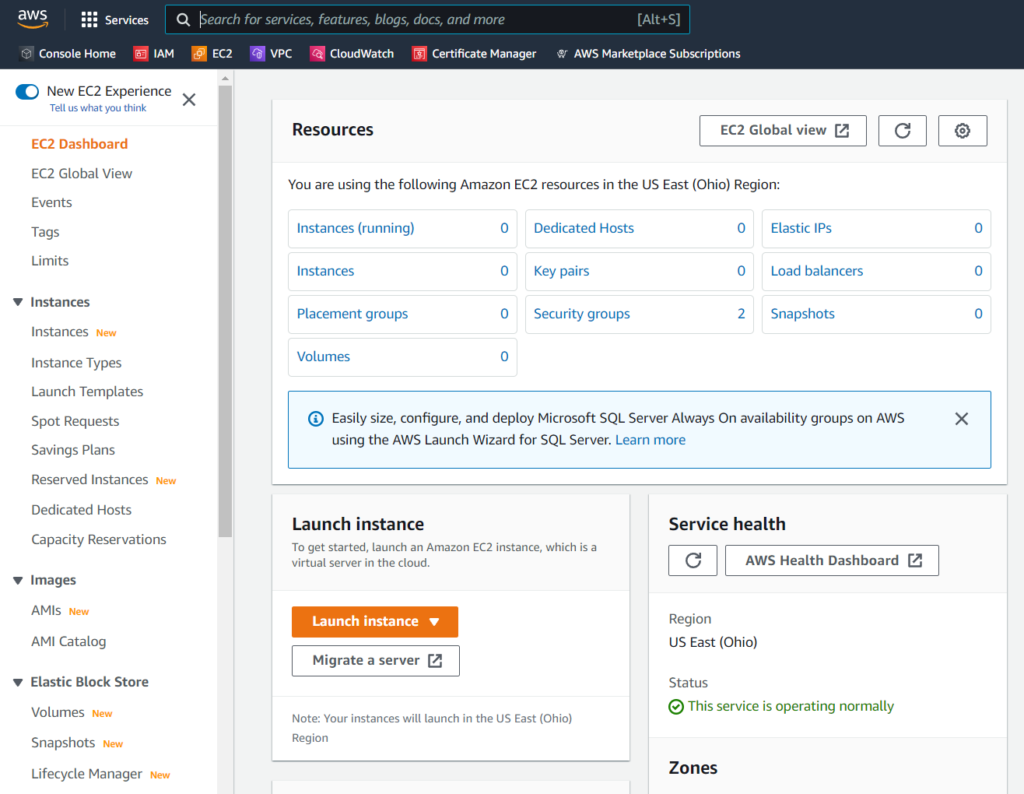
For the next part, we can finally take a break from the VPC dashboard. By searching “EC2” in the AWS searchbar, we can get to the EC2 dashboard:
Elastic Cloud Compute
We’ll use the EC2 dashboard to acquire an elastic IP address. This address will be used to connect us to the internet, as internet facing servers require an IP address. This is very simple, as all we have to do is name the elastic IP address. In this case, elasticity refers to the fact that we can assign this IP address to any of our instances. That’s some high versatility if you ask me. We’ll name it ur_tempo_elastic_IP in keeping with some of our previous naming conventions. In IT fields, sticking to a consistent format for naming things can save you a lot of time and trouble when you need to search for them in the future.
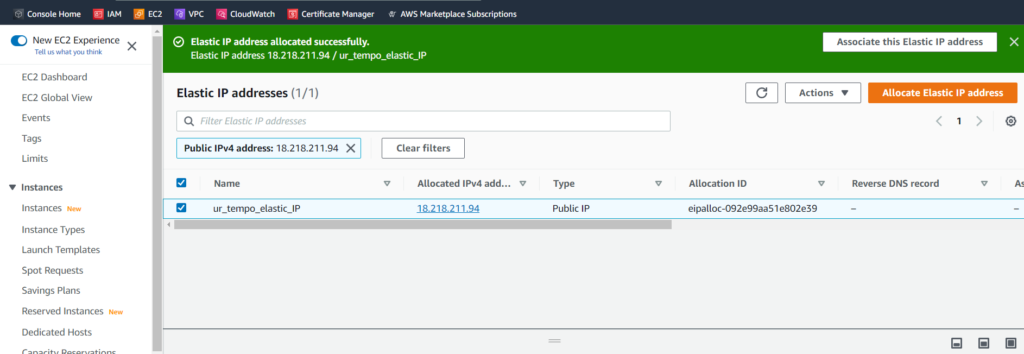
Notice the green notification window, where AWS is offering for me to Associated this Elastic IP address? Very good, AWS. You’re thinking way ahead of us. We’ll associate our elastic IP address a little later in this blog post, but thanks for asking! For now, let’s set up our Network Access Translation (NAT) gateway, which will be used to allow our private subnet to connect to external services, but not the other way around. For a proper ebb and flow of internet traffic, we should use our public subnet and internet gateway. To create a NAT gateway, we must click on NAT Gateways, which can be found in the sidebar of the VPC dashboard. It’s easy to move between different AWS services, if you add them to your Favorites list which adds them to a bookmark. Take a look at the screenshots in this post. You may notice my bookmarked favorites are Console Home, IAM, EC2, VPC, CloudWatch, Certificate Manager, and AWS Marketplace Subscriptions. They are all neatly located right beneath the AWS searchbar.
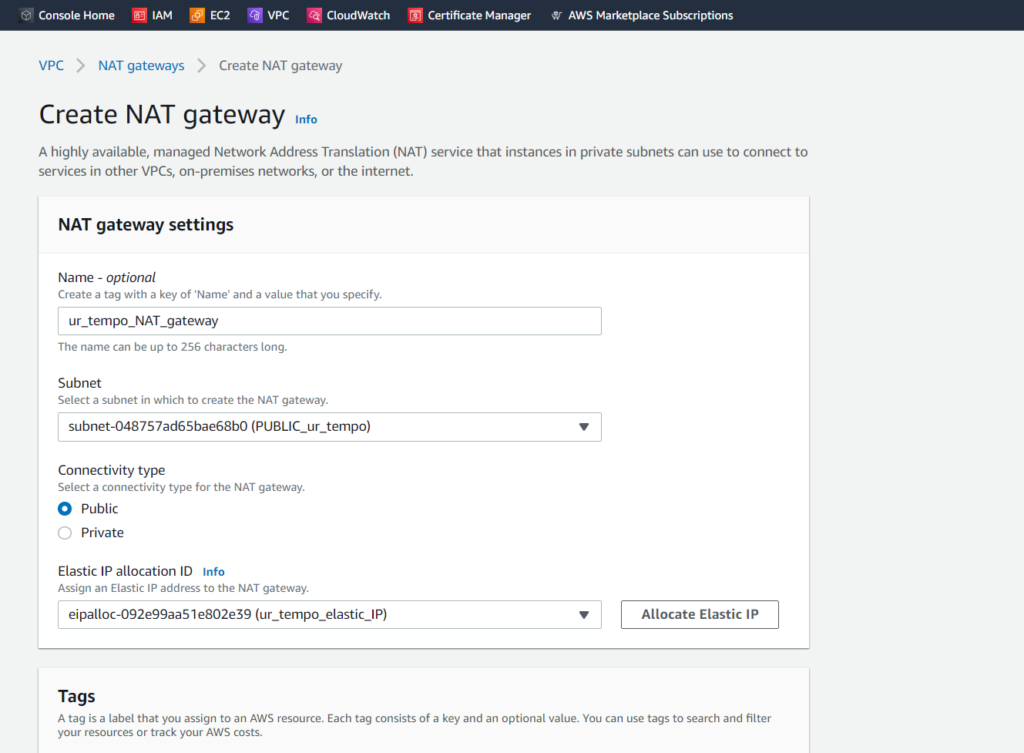
Once we’ve named the NAT gateway, allocated a subnet to it, and an Elastic IP address, we’ll select Create NAT gateway at the bottom of the form (it’s offscreen in the above sceenshot, but orange as usual). The NAT gateway is connected to the public subnet, because it serves as an intermediary for the private subnet. Once created, we’ll head over to Route Tables within the Virtual Private Cloud sidebar. Our public and private subnets are still right where we left them. This time, we’ll be editing route tables.
Route Tables
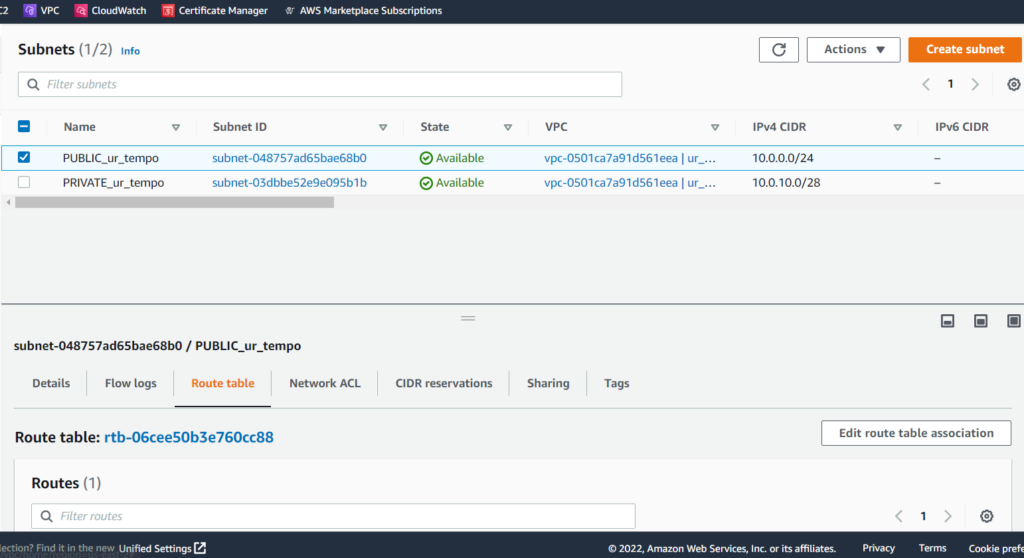
To edit our route table, first we need to identify the Route Table ID associated with our public subnet. By clicking on the checkbox next to the PUBLIC_ur_tempo subnet, we can view Details, Flow Logs, Route table, Network ACL, CIDR reservations, Sharing, and Tags. For this, we need to select Route table. We can see that the route table ID is “rtb-06cee50b3e760cc88,” so we’ll take note of that.
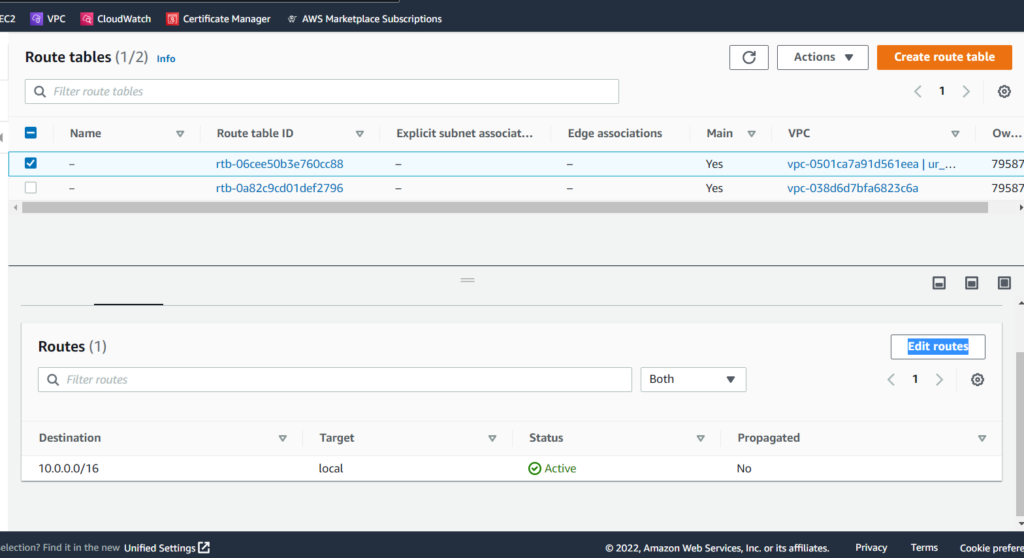
Now that we can recognize the correct Route table ID, we’ll select the checkbox next to it, as seen in the screenshot below. Notice where I highlighted Edit routes? That’s what we need to click next.
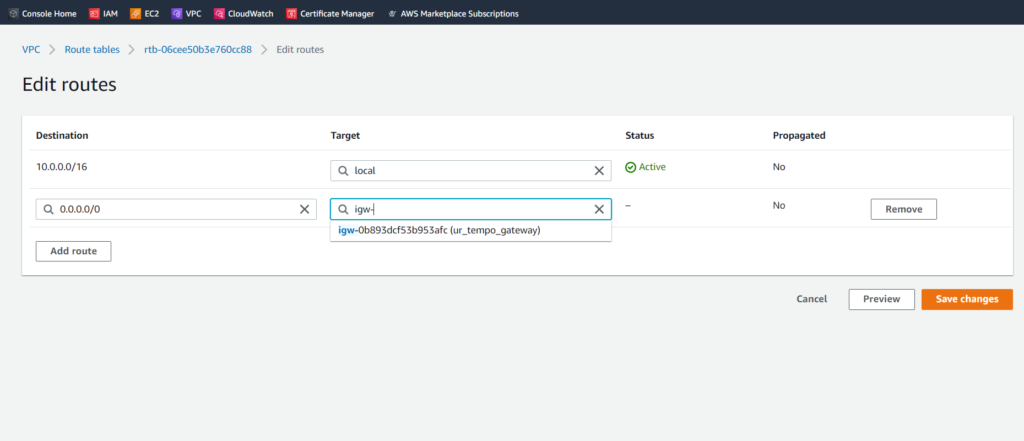
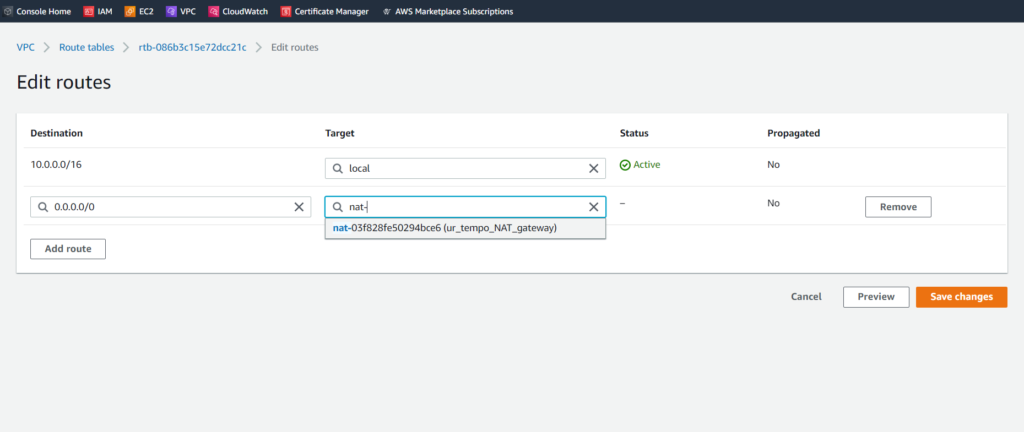
This takes us to the Edit routes form, where we need to Add route to include a rule where the Destination is 0.0.0.0/0 (meaning all addresses) and the Target is the ur_tempo_gateway that we created. As usual, an orange button signals the finish line, so we’ll hit Save changes.
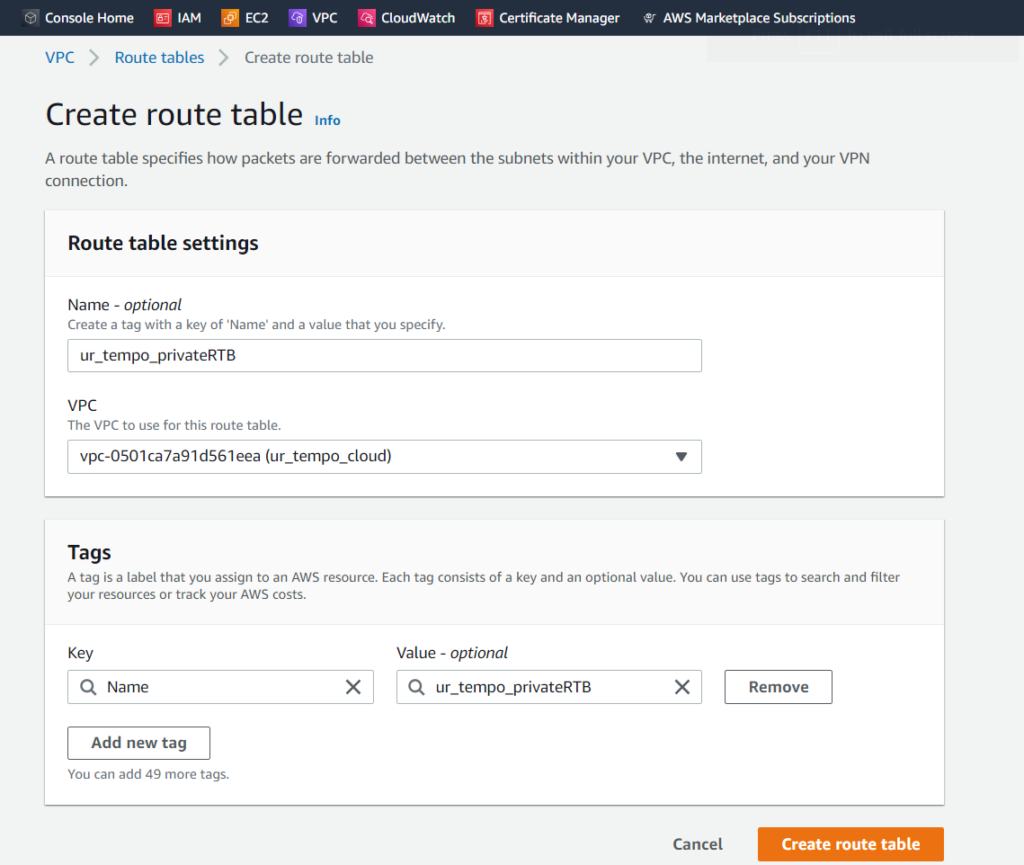
Next, we’ll have to create a route table for our private subnet, with different rules. This can be accomplished by going to the Route Tables page from the Virtual Private Cloud sidebar. All we must do is select the VPC that we want the table to be associated with (ur_tempo_cloud in this case). I named the route table ur_tempo_privateRTB. We can go ahead and select Create route table.
After the route table has been created, we’ll follow the same steps as before, but this time we’ll select our ur_tempo_NAT_gateway instead of the internet gateway from the previous steps.
After clicking on Save changes, we’re ready to start working on our security groups!
Security Groups/NACLs
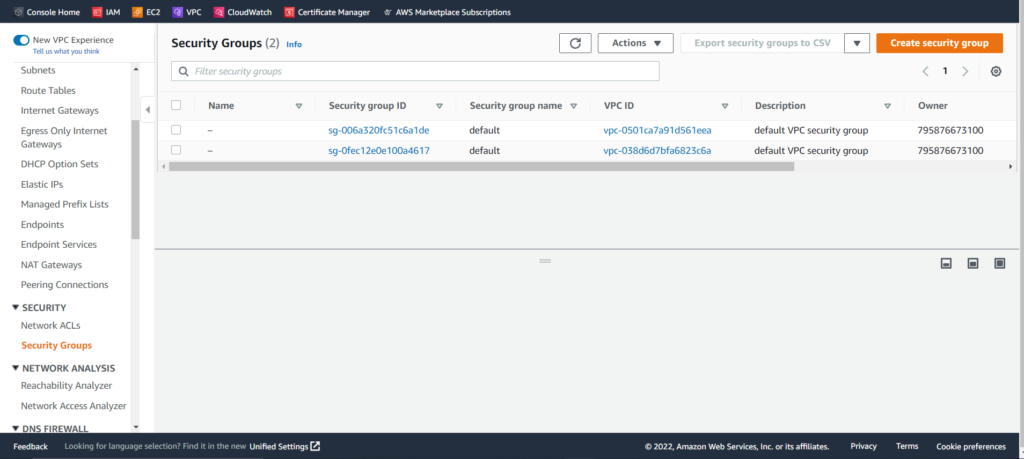
Creating security groups is simple and will be very familiar to the processes that we have undergone up until this point. Simply select Security Groups from the Virtual Private Cloud sidebar. Then, click Create security group to get started.
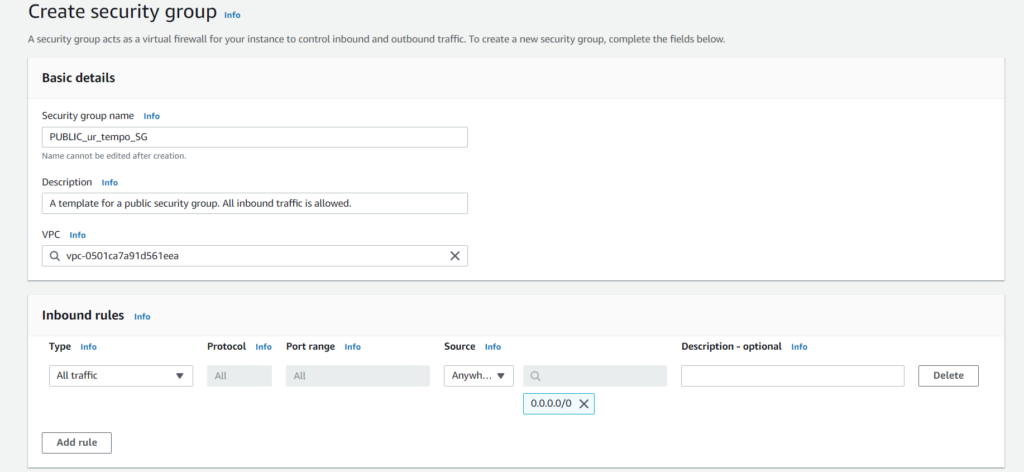
We’ll create both security groups with the same rules*. If you use this blog post as a guide, make sure that the VPC selected is the one that you want your security groups to actually be associated with. A default VPC will be selected unless otherwise specified.
*This is not good practice. When creating security groups, we should make rules that are highly specific to our needs. Because this is only a test run, we don’t have specific needs, so I am using unspecific rules so we can focus our attention on completing our VPC.

We’ll follow the exact same steps for our private security group, but instead we’ll name the new group PRIVATE_ur_tempo. Next up is our NACLs, and you guessed it: we’ll be heading back to the Virtual Private Cloud sidebar in order to create Network ACLs.
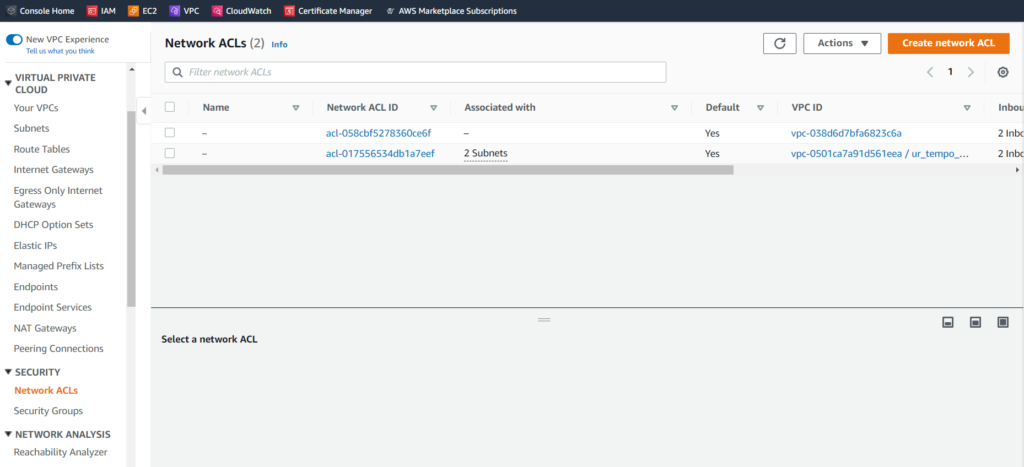
As always, we need to make sure that we are selecting the right VPC (ur_tempo_cloud).
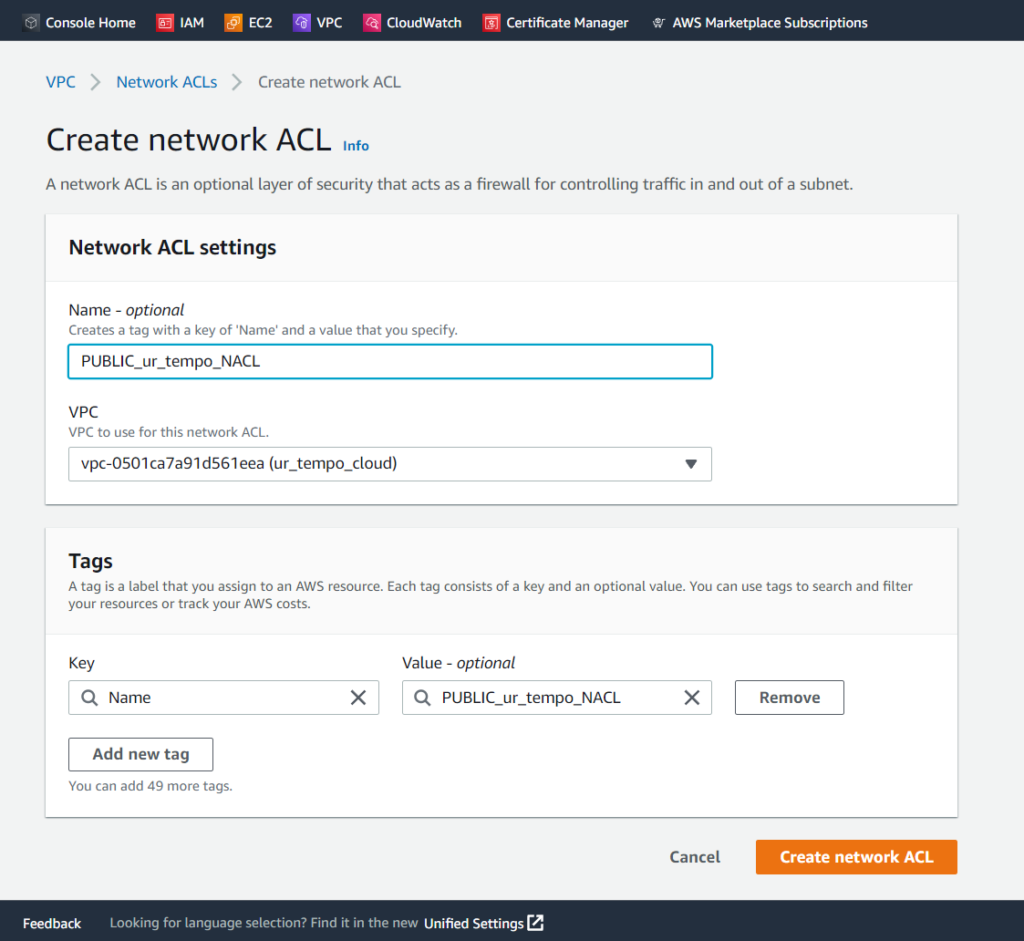
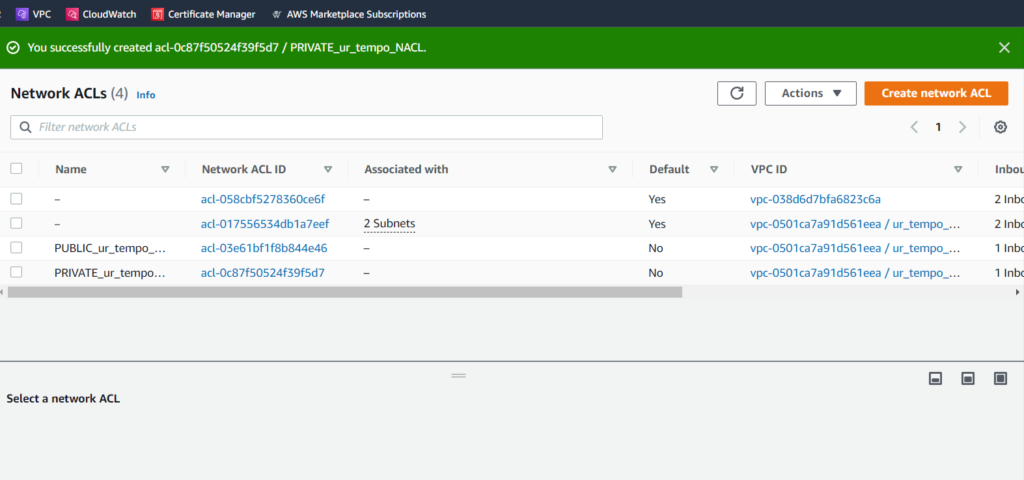
We’ll follow the exact steps to create a NACL for our private subnet. The only difference is that we will name it PRIVATE_ur_tempo_NACL instead. Once created, our Network ACL page should display both. It will look something like this:
We should modify the inbound and outbound rules for our NACLs, but just like are security groups, we won’t be focusing on specific rules as our set up is only for demonstrative purposes. Deploying instances will be the concluding part of this blog post. Get ready for the final stretch!
Deploying Instances
For this one, I created a 90-second clip on how someone might delpoy a Windows 2019 instance. To deploy an instance, all we need to do is search AWS Marketplace Subscriptions for the services that we need. the settings that we desire will vary, so I selected a few reasonable configurations as an example. Once the instance is launched, its state will show as Pending.
That will clear after waiting a few moments:
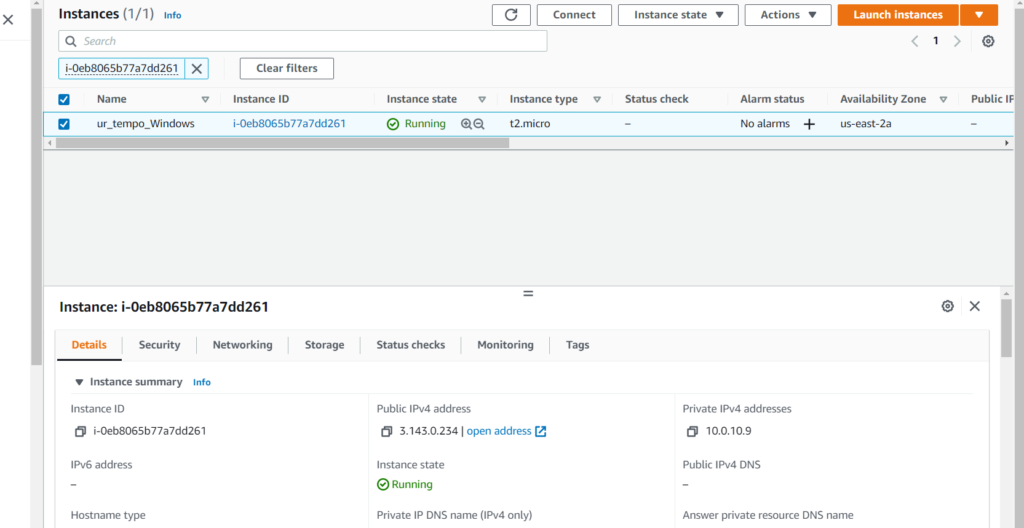
Afterwards, the instance will be Running.
Concluding Thoughts
Reading through each step and learning how to set up a Virtual Private Cloud, is one way to spend your whole afternoon, but once you learn how to use AWS, you’ll be surprised by how quick and efficient its features are. AWS is a very simple service, and I mean that in a good way. After all, think about how many times we came across a page that only required us to click an orange button or two. Think about how much was accomplished by clicking said orange buttons. Cloud computing is the future, and the future is looking quick and convenient as long as AWS is steering the ship. If you have any question abouts AWS, you can find an overview of all Amazon Web Services at https://docs.aws.amazon.com/whitepapers/latest/aws-overview/aws-overview.pdf. You’re also welcome to contact us at connectme@urtempo.com if you have questions about this blog post or are interested in kickstarting your cybersecurity career.
Thank you for joining me on this cloudy day. Whatever the weather, we’re always happy to have your company at Ur Tempo!
*Update: You may as well, bookmark that link to the overview of Amazon Web Services if you’re interest in taking the AWS Certified Cloud Practitioner exam. It is a very useful resource that helped me earn a passing score!