New to cybersecurity? You’ve probably heard about the popular relational database management system (RDMS) known as MySQL. In fact, experience with MySQL may be listed as a minimum qualification for many of the positions that you’re applying for. Due to its popularity and universal value to commercial organizations, IT professionals are likely to encounter MySQL in one form or another. One such form is called MariaDB and I will be walking you through some of its basic features.
MySQL and MariaDB?
Both MySQL and MariaDB are relational database management systems. MySQL was released in 1995, and MariaDB (a community made fork of MySQL) was invented in 2009. Though MySQL has been around for nearly three decades, it may be even more relevant than its newer counterpart depending on the specific needs of an organization. As relational database management systems, MySQL and MariaDB serve the purpose of storing massive amounts of data using tables and columns. Those tables and columns can contain logically overlapping values that ultimately create an expansive and relational database.
Many RDMS incorporate a programming language known as structured query language (SQL), which utilizes user-friendly syntax that can be interpreted through terminals or graphical user interfaces. In this post, I will be using the command line interface of a Linux virtual machine to show you how to create databases and tables with MariaDB. Depending on your operating system, installation steps will vary, but once you have installed MariaDB, we’re ready to begin.
Note: https://mariadb.org/download/
Starting MariaDB
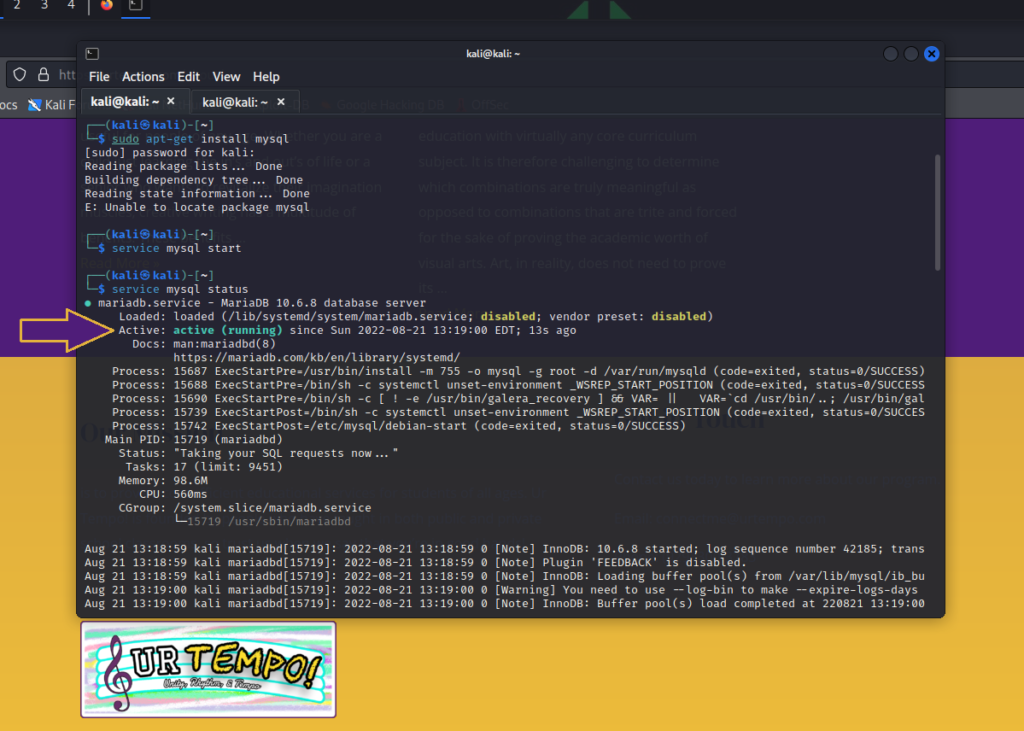
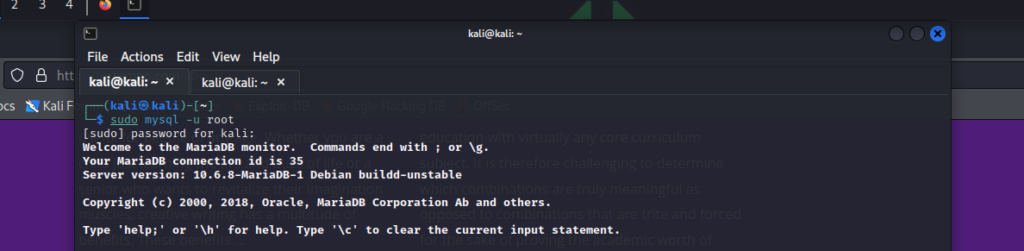
Having installed MariaDB, our first course of action is to check if our new database server is properly running. Note the commands service mysql start and service mysql status. The latter provides information about the service and version of MariaDB on the virtual machine being used. In this case, we are most interested in the Active line, which displays the message “active (running).” Since we are using a server associated with our host computer, logging in with mysql -u root will suffice (though you may need to apply SuperUser privileges).
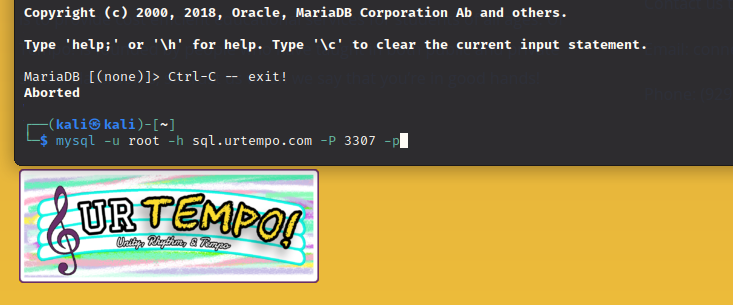
Your organization will likely provide you with access to numerous servers and databases. A more specific login method will look like the example below, where a host, port, and password must be inserted into the command line.
After logging in, we can take a look at our stored databases using the command show databases. Notice the colon I inserted after typing “show databases?” Using the syntax of MySQL/MariaDB requires users input ; to indicate the end of a query. There are four databases being served, but what if we wanted to add a fifth? Doing so is simple: type create database, followed by your name of choice and a colon. In this demonstration, I’ve chosen the name “urtempo_testbase,” so the syntax is as follows:
create database urtempo_testbase;
Creating Our First Database and Table
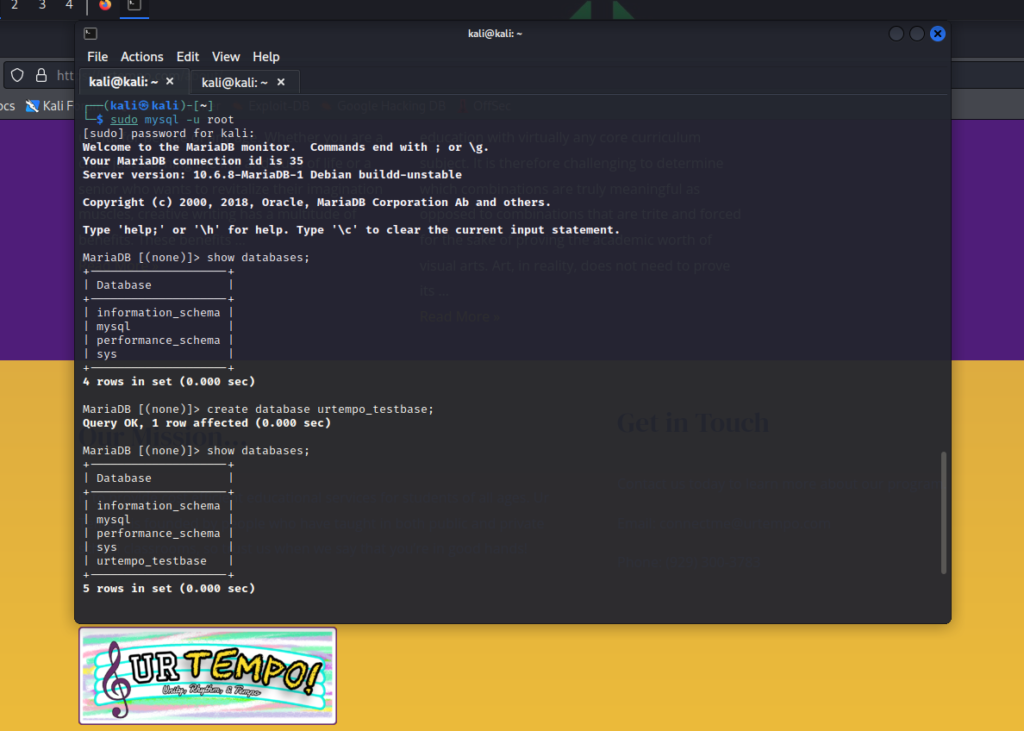
Notice how the urtempo_testbase is displayed the second time that I typed show_database? That corresponds with the message that MariaDB displayed after I created the table: Query OK, 1 row affected, which informed us that urtempo_testbase was properly created.
To begin using and editing a database, we’ll input the syntax use urtempo_testbase (don’t forget the colon at the end). Now that we’re using the urtempo_testbase, we can create a table by entering the following:
create table urtempo_customers (
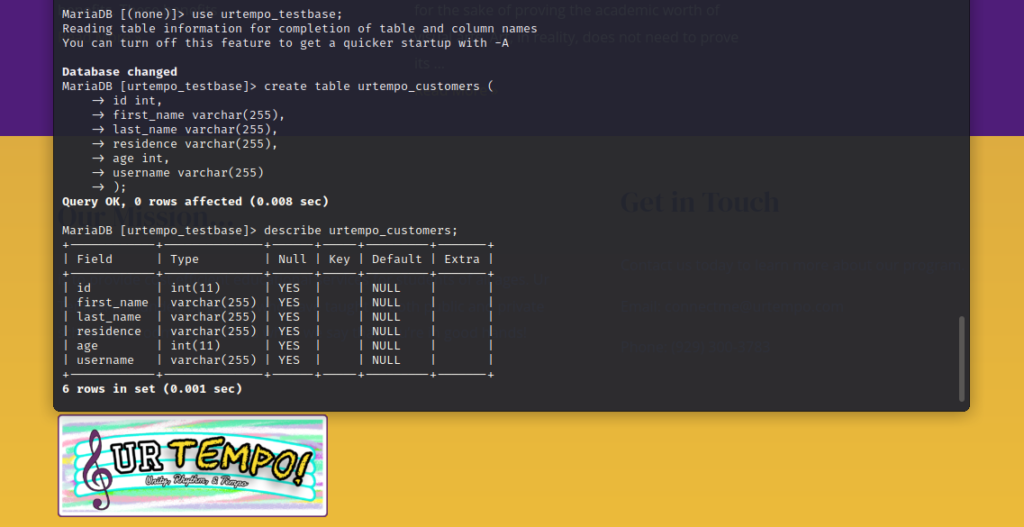
No, that open paranthesis at the end is not a typo. In order to define the fields that will be displayed in the table columns, we need to define them individually. This cannot be achieved by ending our thought with the usual colon. By adding the open paranthesis, we are essentially telling MariaDB to listen to our specific needs one at a time. Each line must end with a comma before being entered. In the first field line (indicated by the indented arrow), a name is entered (id) and a field type is indicated (int). In this case, int stands for integer, meaning that a number is expected. In the other field lines, you’ll notice that I wrote varchar(255) next to respective names. In this case, varchar(255) means that up to 255 variable characters will be allowed as string input.
At the end of my field list, note that the line username varchar(255) is missing a comma. This is because it is the last field that I am entering and thus doesn’t need a comma.
Finally, ); is used to denote the end of the user’s field inputs. These fields will become columns in our table, so now we have to add the data in our rows.
Adding Rows to Our Table
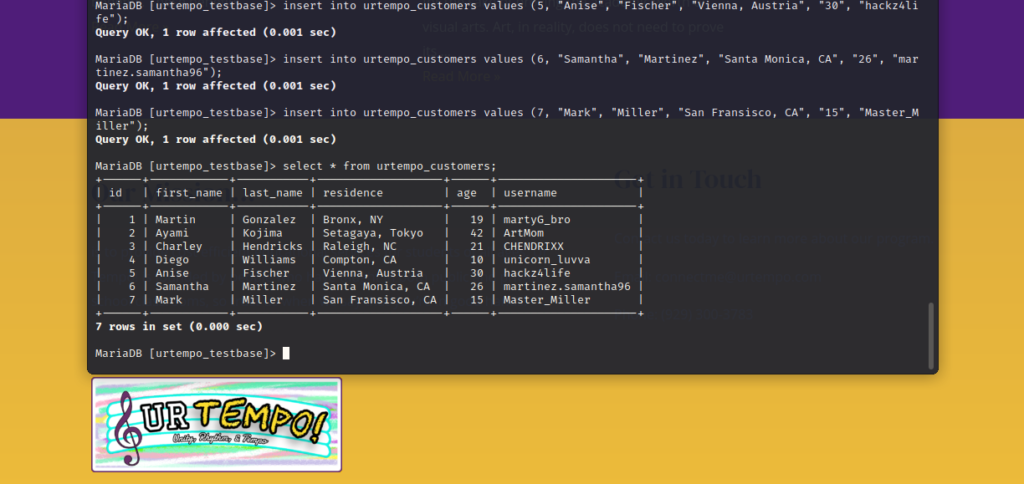
Below, you’ll see the syntax for adding rows to our table.
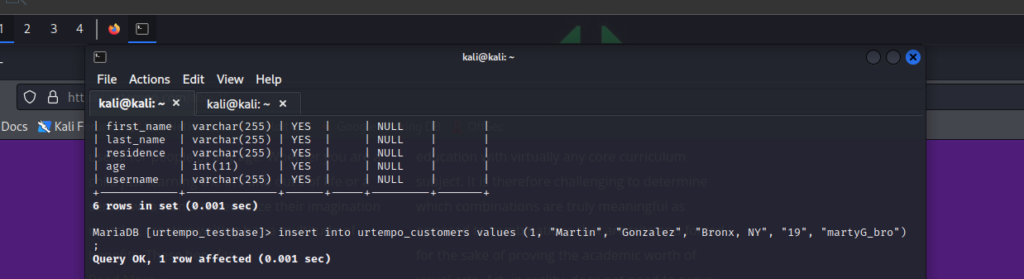
insert into tells MariaDB that we are inputting data to a row. urtempo_customers values determines the table and preps MariaDB for the values (integers and variable characters) that we set up earlier. Previously we created the fields id, first_name, last_name, residence, age, and username, so we must insert our values in that order. Compare our values with the fields that we decided on:
id = 1, first_name = Martin, last_name = Gonzalez, residence = Bronx, NY, age = 19, and username = martyG_bro.
Because a string contains more variables, quotation marks will keep the syntax operational in the case of special characters. This is not a concern with integers, so the quotation marks work either way.
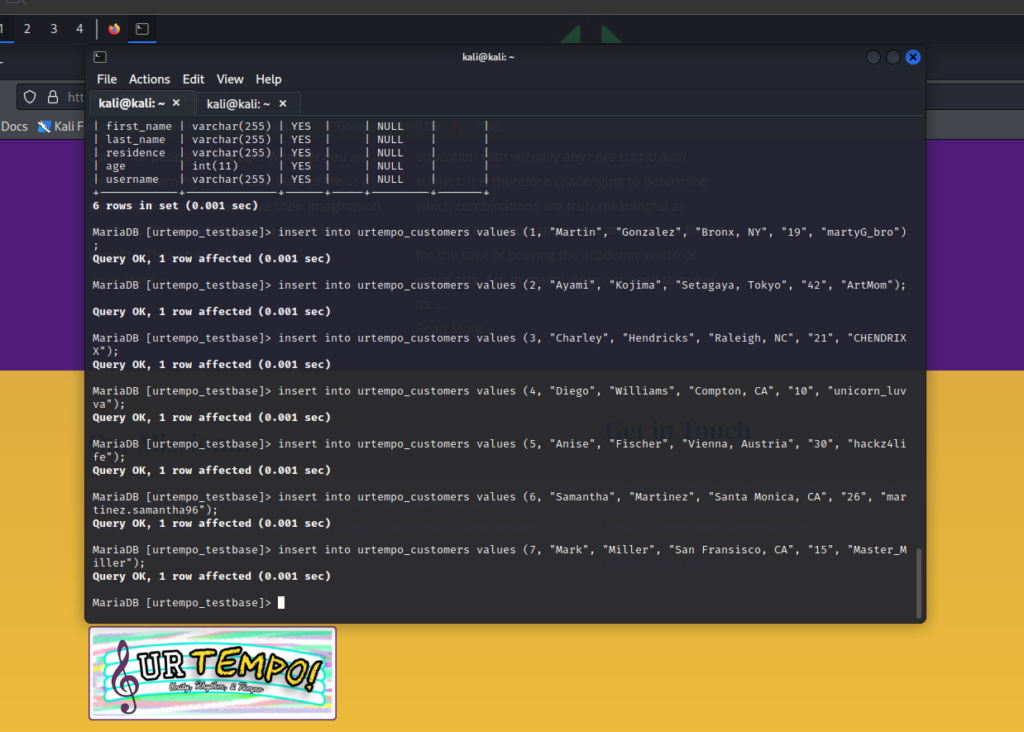
We can repeat the steps to create some more row entries.
Visualizing Our Table
Bringing together our hard work can be accomplished by using a wildcard (*) in our query. The syntax select * from urtempo_customers; calls for MariaDB to display all data in a table of our selection. Below, you can see all of our field columns displayed on top. Our values are neatly organized beneath each one. Looks like we’re good to go.
In the example database that we created, there are only seven rows. Imagine if there were twenty thousand rows. What if a database had more tables? Below is an example of another table within the urtempo_testbase database.
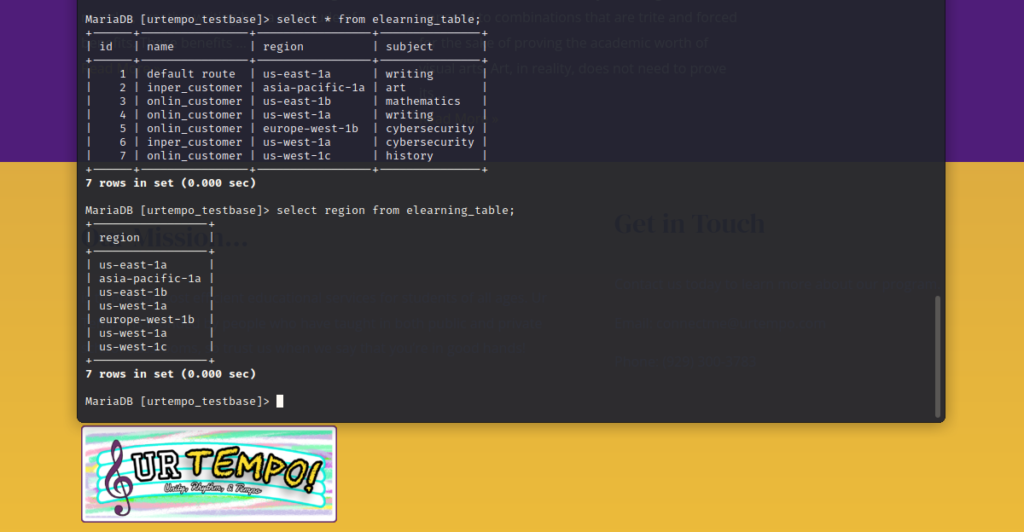
Note the seven rows that also have a column named “id” just like in our first table. Say we were to match id 5’s values on both tables. We would be able to ascertain that Samantha from Santa Monica, CA is an online customer learning cybersecurity with us, and that she is located in western Europe.
We can add more and more tables to correlate different types of information with common fields. That’s the power of a relational database management system such as MySQL or MariaDB, but there are far more than just those two. Your organization will determine which RDMS is most suitable for the work that you will be doing.
Explore and Have Fun!
There’s tons of ways to query data in MariaDB. The following are a few examples:
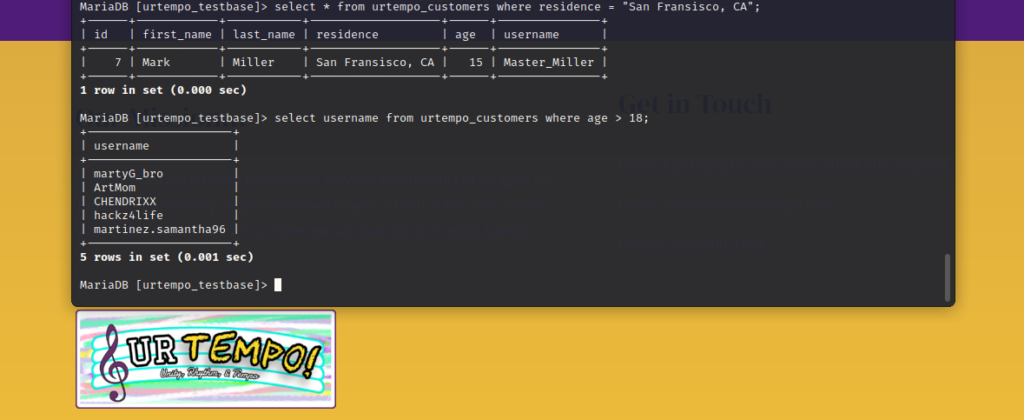
By adding where residence = “San Fransisco, CA”; to select * urtempo_customers, we are telling MariaDB to query only entries from that specific location.
By adding where age > 18; to select username from urtempo_customers, we are telling MariaDB to query only usernames from accounts that belong to adults.
In the example below, we can remove an entire row of data based on specifying a single value (in this case the value “hackz4life”). We can restore that row by using the same input from earlier.

In the final example, seen below, you can see that we are able to add new columns to a previously created table. Rather than using integers and variable characters, the values are boolean this time!
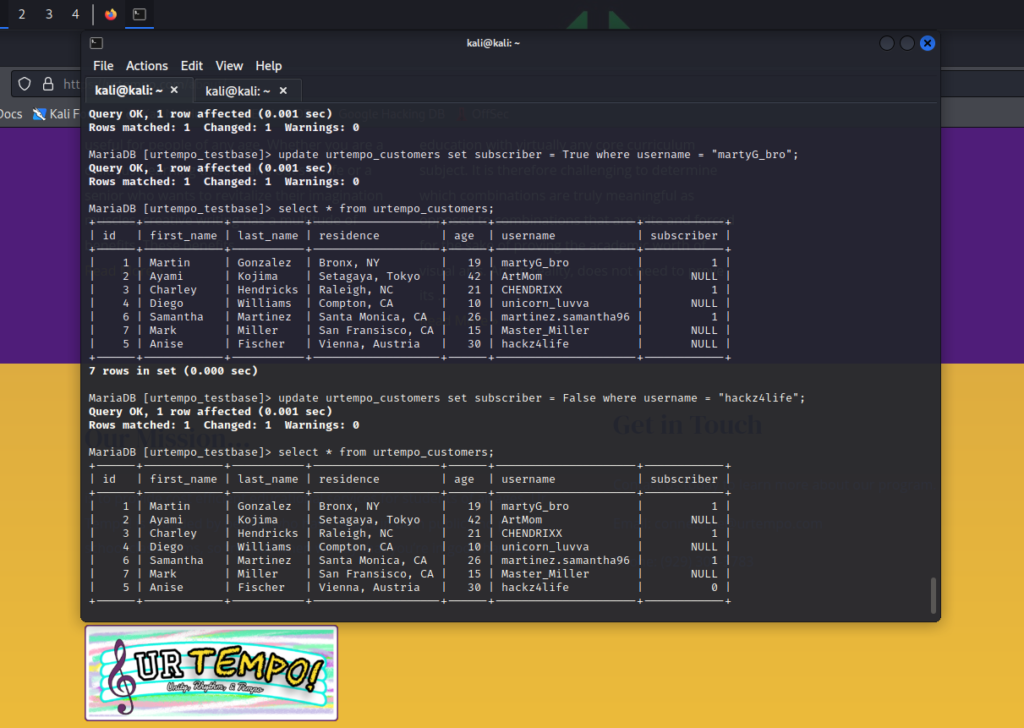
For now, the possibililties may as well be endless!
Closing Thoughts
MariaDB is an incredibly convenient SQL relational database, so don’t let its vast potential intimidate you. Hopefully, you feel a little more acclimated to the functions and syntax of MariaDB. In the future, I plan to write about my experience at AWS Summit 2022, in which I learned to MySQL with Amazon’s relational database Aurora.
If you read this blog post and realize that cybersecurity or database management is for you, once again we encourage you reach out to us (connectme@urtempo.com) when you’re ready.
Until then, stay safe and stay educated!